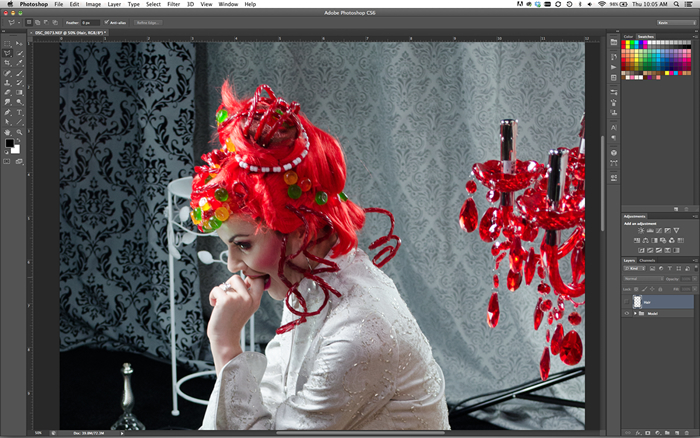
Photoshop is the leading application used for image editing. Whilst it has worthy competitors like Adobe Fireworks, it still remains arguably, the most popular solution especially by photographers.

For any beginner, any version of Photoshop can look very daunting to use but you would be surprised at just how much mileage you can get out of just its basic tools and functions upon which, you can expand over time.
- Getting to know the basics
The first thing to become familiar with is the terminology particularly, understanding the difference between the ‘Image’ and the ‘Canvas’. The canvas – your work area – is the grey area and the image is the part in the middle of the canvas that by default is white but, can be made to have a different background colour or transparent. The sizes for both can be amended but it is the image size that affects how big or small the file is in size.
On the left hand side you have your Toolbox which displays icons for the most popular tools such as crop, lasso, eraser, pen etc. You can only use one tool at any given time and to select it, you simply click its icon from the Toolbox.
On the right side, are the Palettes. These enable you to perform various tasks and you can customise your window by choosing to display or hide certain palettes. They are usually organised into groups and you can reorganise their order as well as reduce their visual size.
- Move around an Image
The easiest way to accurately edit images is to move around them rather than relying on your scroll bars to go up, down, left or right. You can do this by selecting the Hand tool, which has a white hand as its icon, and the Zoom tool, with the magnifying glass as its icon both of which, are positioned next to one another in the Toolbox.
- Working with layers
Using layers when working in Photoshop is excellent practice and can make editing or undoing changes you have made, far easier. In essence, the layers form on top of one another but, their actions are stored within their own layer. This means that if you want to make a particular change to one layer, the others remain unaffected.
The first thing you should therefore do when using Photoshop is duplicate the Background layer which you can do through the layers window if open or, the Layout menu option.
- Image Adjustments
Photoshop offers some automatic image options that are worth exploring. You can find the options under the Images menu option by selecting Adjustments. This shows a variety of options like Levels, Auto Contrast etc. Let’s go through some of the most useful ones.
- Auto Levels – when you release your mouse button from selecting this menu option, you should see that the dark, mid-tones and light areas of your image are affected.
- Auto Contrast – because this option doesn’t adjust channels individually, its effects make the highlights appear lighter and shadows appear darker.
- Auto Colour – this presents a range of options from which the ‘Algorithms’ are used to choose how the adjustment is applied.
- Brightness/Contrast – this enables the tonal range of the image to be adjusted. When in normal mode, the two areas are applied in proportion to one another in the Image layer.
- Useful Shortcuts
Keyboard shortcuts can be a huge time saver when it comes to using Photoshop since you are likely to switch between tools a lot. Here are some useful shortcuts worth remembering:
- H(and tool) – used with the Zoom tool this enables quick panning.
- Z(oom tool) – by holding down the Alt key you can switch temporarily out of zoom out mode.
- Ctrl+0 (Fit on Screen) – to get the entire image in front of you press Ctrl and zero.
- Tab (Hide/Show Palettes) – you may need to hide palettes to increase the space you have for work.
- [ or ] – this increases or decreases the Brush size, respectively.
- Ctrl+Shift+N(ew Layer) – this brings up the dialog box and places the new layer on top of the active one.
- Ctrl+J (New Layer Via Copy) – creates a duplicate layer of the active layer.
- Ctrl+S(ave)
Finally, press Ctrl + Alt + Shift + K to see all the keyboard shortcut commands!
